One of the main goals of DevOps culture is to automate everything as much as possible. By automating processes such as environment, application, authorization, security, quality, and testing, we establish a more agile organization. In the software lifecycle, we use tools that enable the automation of processes required to develop a feature and deliver it to the customer by deploying it to live environments. One of the first tools that come to mind when thinking of DevOps is build automation tools. We should choose one of the well-known tools in the market according to the organization’s needs. In this blog post, we will install Jenkins, a tool that is especially popular because it is open source and has abundant documentation and support resources.
Jenkins is the leading open source automation server, providing hundreds of plugins to support building, deploying, and automating any project. Before starting the installation of Jenkins, we need to consider why we will use Jenkins, the size of the teams that will use the system, the criticality of the applications, and so on. The most important decision to make during installation is whether we need a standalone or cluster setup. For example, if it will be used for non-critical tasks in a small organization and the number of build automations is low, a standalone installation may suffice. However, if it compiles critical applications, deploys to live environments, and the number of teams using it is large or will increase in the future, we must choose the cluster structure.
A standalone installation is simple; the Jenkins application is installed on a single server. The installed application runs as a single instance (master). The configuration files of the Jenkins application, build dates, job configurations are all on the same server, and build jobs run on this single server. The main advantage of a standalone installation is that management is simple, with everything observable on one server. However, if this server becomes inaccessible, no build automation will run, and the SDLC processes of critical applications will be disrupted. Also, scaling this setup is only possible vertically; as the teams using Jenkins increase, the memory, CPU, and disk capacity of the server must be increased to meet the growing load demand.
In a cluster installation, a Jenkins master (controller) and multiple agents are installed. The Jenkins controller does not run build jobs; instead, it schedules them for the agents to run. The agents, receiving the job notification, run the job and deploy it to the necessary environments. The main advantage of this structure is its ability to easily meet increasing demands on Jenkins and its easy scalability. Increasing demands are met by adding an additional agent to the cluster; post-installation, the master schedules the jobs it cannot handle to the newly added agent, balancing the loads. Another important advantage is that certain applications may need to be built on specific servers with certain frameworks or may need to run on a special server for security reasons. To meet these needs, a Jenkins agent can be installed on a specially selected server and included in the cluster. During job configuration, the job can be tagged to run only on this server.
Jenkins Cluster Installation
After configuring two different virtual machines, one as the controller and one as the slave, on your favorite cloud provider or your own server environment, we can start the installation. In this blog, for demonstration purposes, we will set up servers with one slave running the Ubuntu 20.04 operating system, and the necessary installations will be configured according to Ubuntu 20.04. However, you can add multiple slaves to the cluster using the same method according to your needs.
Java must be installed on the server for Jenkins to run. For each Jenkins server in the cluster, in our example one controller and one slave, you can install Java as follows.
sudo apt update
sudo apt install -y openjdk-17-jre
java -version
After completing the Java installation, you can proceed to the Jenkins installation. We can install Jenkins on the Jenkins controller (master) server by following these steps.
It is recommended to download the Jenkins installation from the project’s repository because the project repository always updates the LTS (Long-Term Support) version. You may find an outdated version in Ubuntu or different repositories.
To add the Jenkins repository to your Ubuntu system, you can run the following commands:
curl -fsSL https://pkg.jenkins.io/debian-stable/jenkins.io-2023.key | sudo tee \
  /usr/share/keyrings/jenkins-keyring.asc > /dev/null

echo deb [signed-by=/usr/share/keyrings/jenkins-keyring.asc] \
  https://pkg.jenkins.io/debian-stable binary/ | sudo tee \
  /etc/apt/sources.list.d/jenkins.list > /dev/null
After adding the repository to the system, we can update the system and install Jenkins.
sudo apt-get update
sudo apt-get install -y jenkins
After installing Jenkins, you can check the status of the service with the following command. The output should be similar to the image below.
sudo systemctl status jenkins
When you install Jenkins by default as described above, it will run on port 8080. If the firewall is active on the server, you need to allow traffic on port 8080. To check if the firewall is active, you can run the following command:
sudo ufw statusIf the firewall is not active, you can activate it and allow traffic on port 8080 with the following steps:
sudo ufw allow 8080

sudo ufw enable
To perform the initial configuration of Jenkins, we need to access the web interface. We need to enter the IP address of the Jenkins controller server and the port on which the application is running into the browser. The server must be accessible on port 8080. If you are using Azure, AWS, or Google Cloud, you need to allow this port from specific networks.
http://<jenkins controller ip>:<port number>
After entering the server and port information into the browser, a web page like the one below will appear. On this web page, to ensure that the installation is securely done by the administrator, a password located on the server is requested. You need to open this password with the cat command and enter it on the screen.
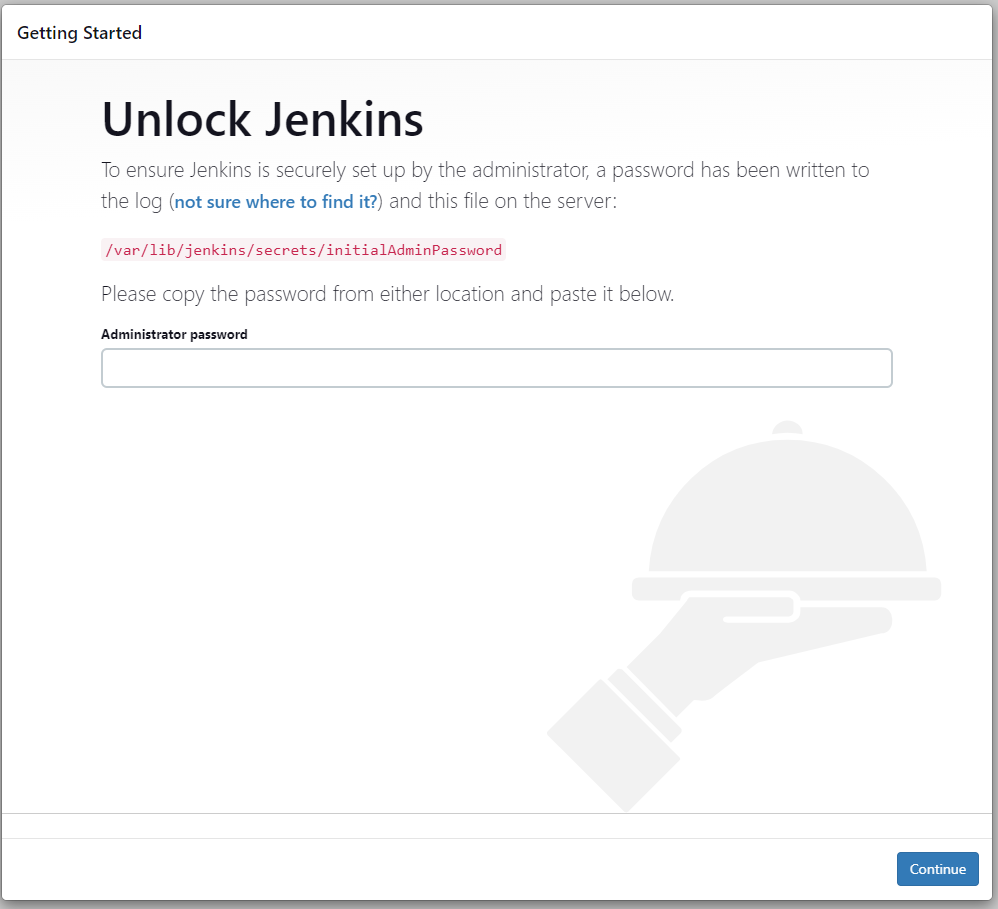
Run the following command on the server where Jenkins is installed, then enter the output into the password field and click the Continue button.
sudo cat /var/lib/jenkins/secrets/initialAdminPassword
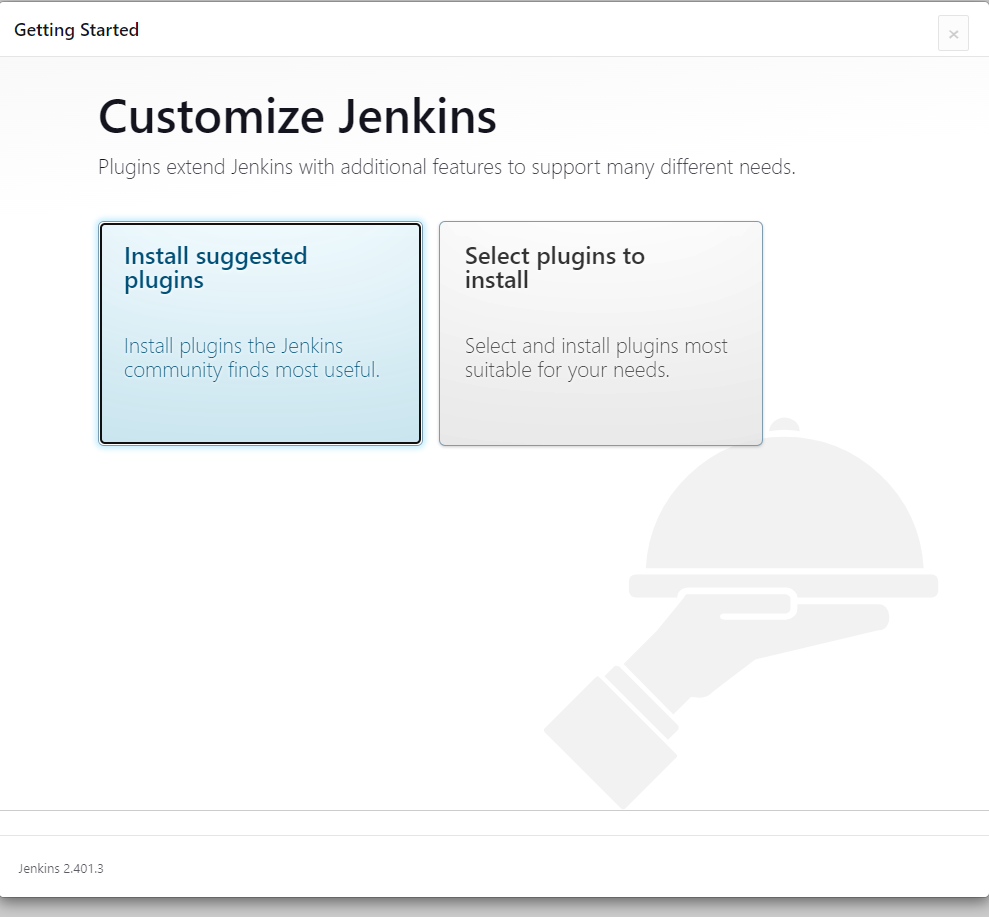
On the next screen, you will be prompted to select which plugins you want to install for Jenkins. Jenkins has a rich ecosystem of plugins developed for almost every need. You can choose to automatically install plugins that the community finds useful, or you can list and install plugins tailored to your specific requirements. Additionally, after installation, you can install new plugins or remove existing ones at any time through the Jenkins interface. For demo purposes, we will choose the option “Install Suggested Plugins.”
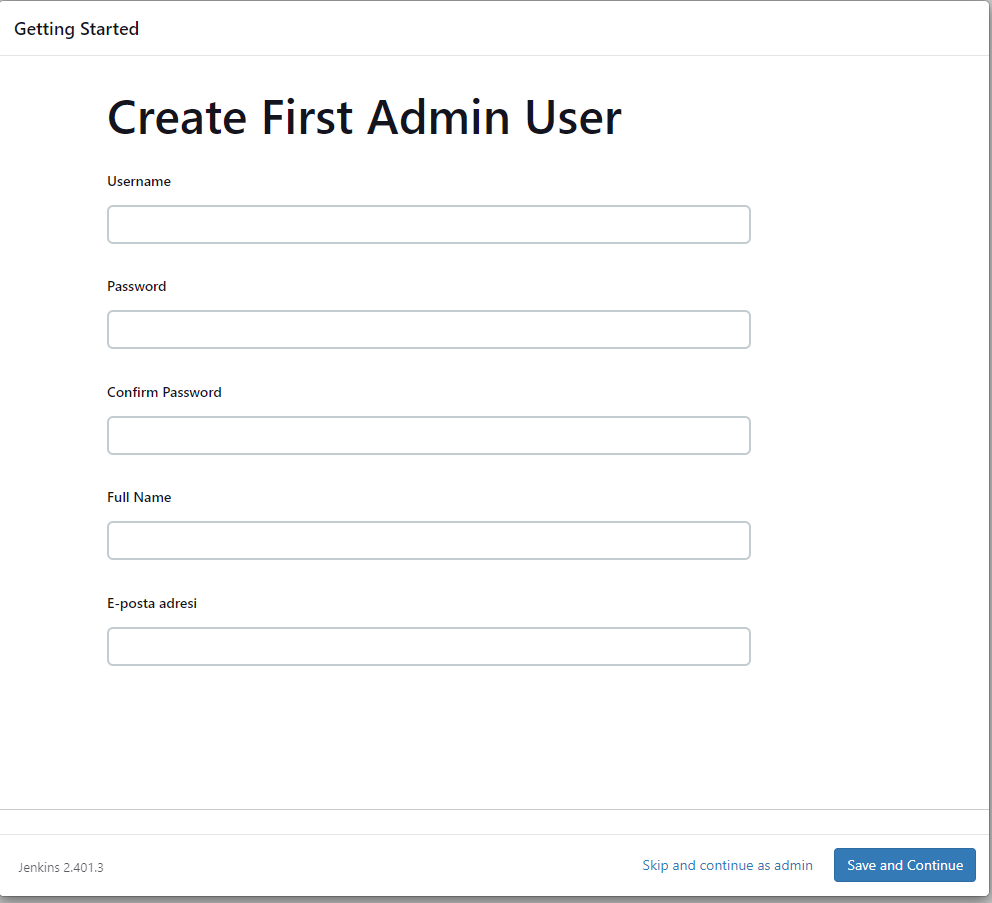
On the next web page, we need to create the first admin user. You can create this user as you wish.
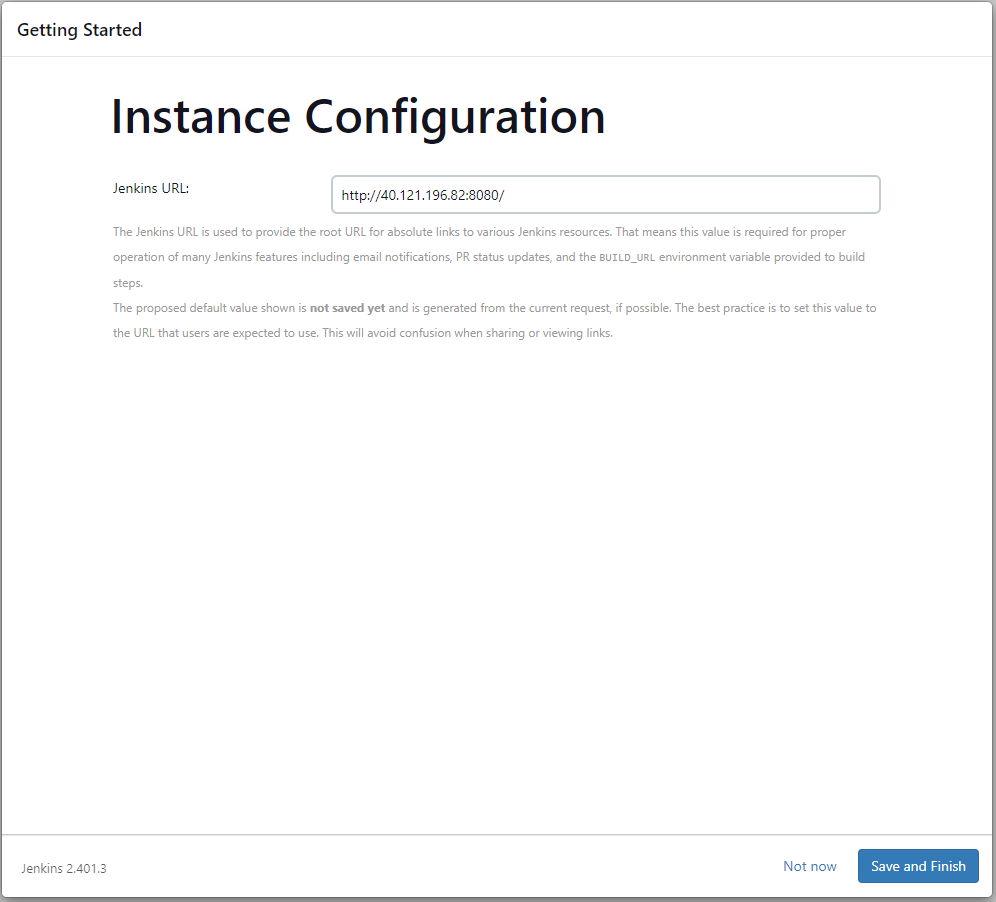
On the screen below, we are expected to specify the Jenkins root URL. We will log in to Jenkins with the URL we enter in this field, and as stated in the description, the BUILD_URL information that can be used in Jenkins’ email notification and build steps will be based on this root URL. The pre-filled value on the screen usually shows the server IP in the default installation. If you have a domain name for Jenkins, you can write it in this field.
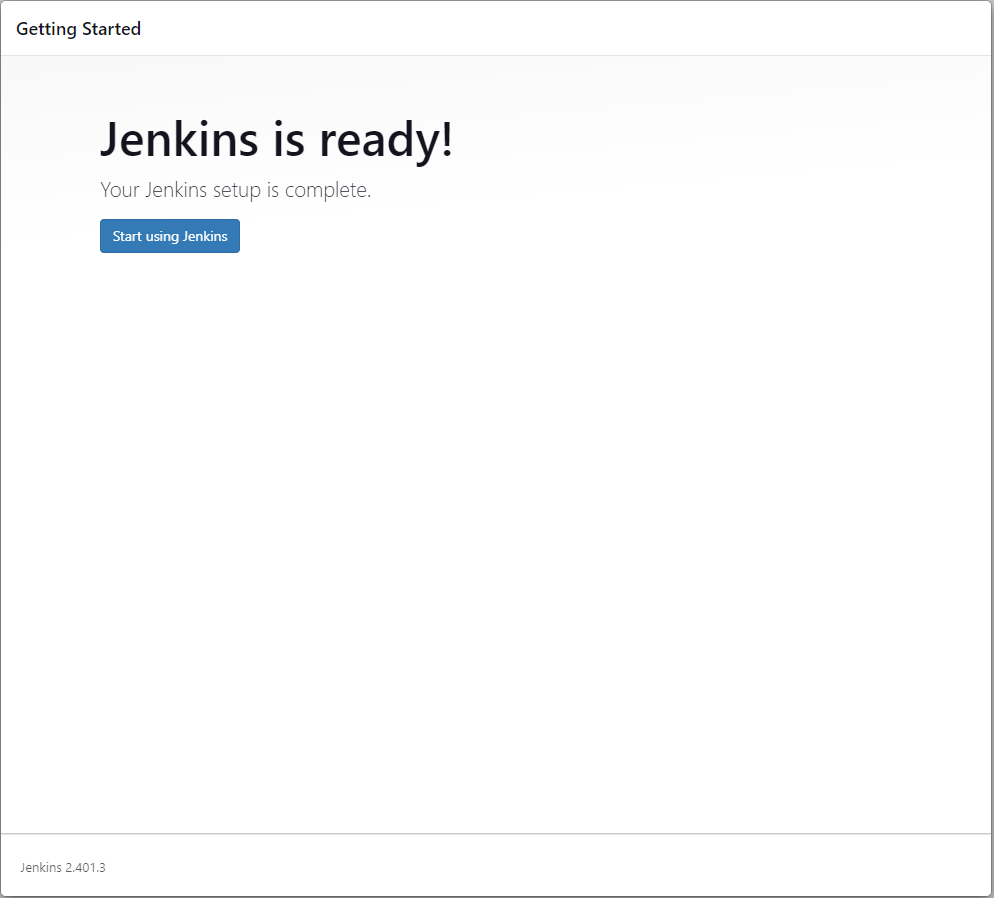
On the next web page, a screen appears informing you that Jenkins is ready for use, and by clicking the Start Using Jenkins button, you will be directed to the home page.
We have completed the Jenkins installation by completing the steps above, but it would be more beneficial and safer to install Jenkins in a cluster structure, not standalone. Build operations in Controller are not recommended by Jenkins, and in a distributed structure, we will add a slave to the cluster to run build jobs on slave servers.
To add a build slave to the cluster, we need to follow the steps below. You can add a build slave with a different OS type, but in this example we will include a server with the Ubuntu 20.04 operating system in the cluster.
We need to go to the Manage Jenkins page from the Jenkins main screen and then access the Nodes and Clouds page.
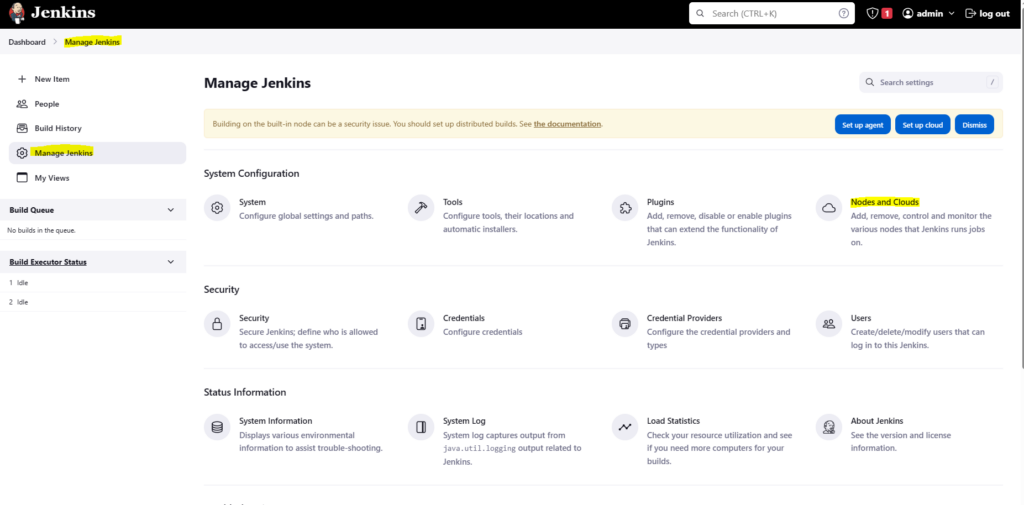
On the Nodes and Cloud page, we can view and configure the nodes in the cluster or add a new node. As you can see on the screen, the Built-in Node will appear in the list in a newly installed Jenkins. It is a server that we configure as a Build-in Node controller. To add a new node, we need to click on the New Node button at the top right of the page.

On the first page that opens, you can write the name we will give to the build node and select the Permanent Agent option, then click the Create button and go to the next page.

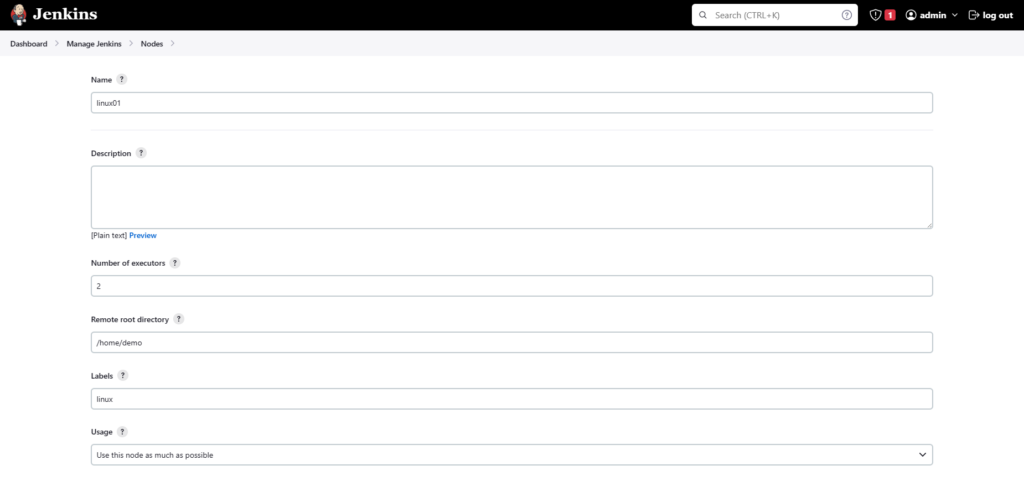
On this page where we will configure the node, we must enter some information, some are optional.
Number of executors: This field allows you to specify how many jobs can run concurrently on that node. By default, it is set to 1. You can adjust this value based on your system’s CPU capacity and workload requirements.
Remote root directory: The agent must have a folder on the server where it will be installed. You can choose a temporary location for this folder, such as tmp, but when the server reboots, the tools and source code you downloaded in the pipeline will be deleted. You can give a path on a permanent disk to benefit from the cache.
Labels: It provides a way to categorize and group build agents (nodes) based on specific characteristics or capabilities. This feature allows you to effectively manage and distribute build jobs across different types of nodes or agents in your Jenkins environment.
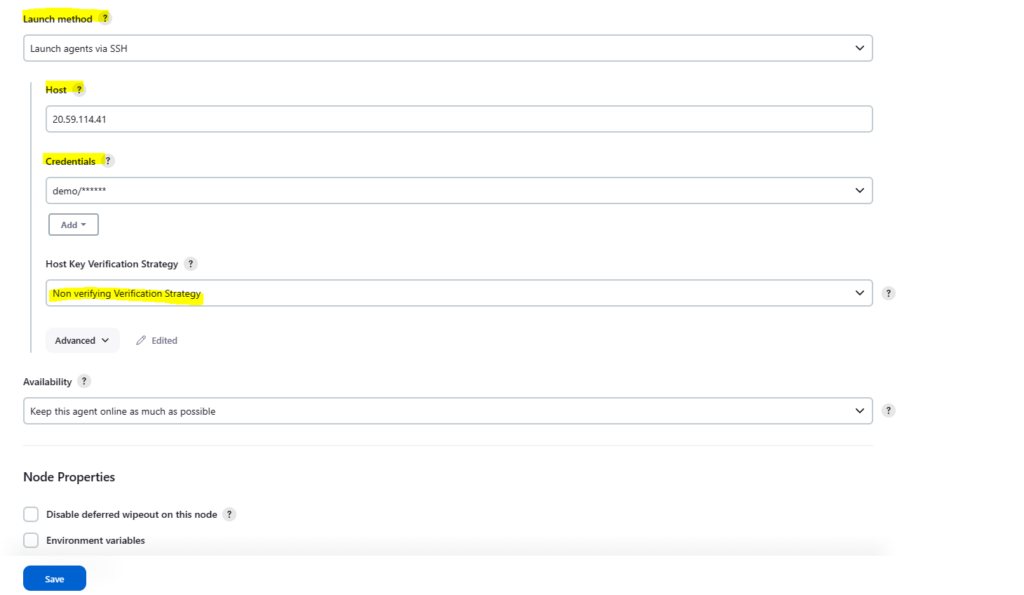
Launch method: To install an agent on a server in Jenkins, there are two different methods available. The first method is “Launch agents via SSH,” which involves Jenkins controller connecting to the target server using the provided credentials to automate the installation. It’s essential to ensure that Jenkins controller has access to the SSH port of the agent server.
The second method is “Launch agent by connecting it to the controller,” which is an inbound method. In this approach, Jenkins provides you with a JAR file and a command to run on the agent server. After manually executing this command on the server, the agent will join the Jenkins cluster.
We will use the ssh method in this installation, but you can choose the inbound method according to your needs.
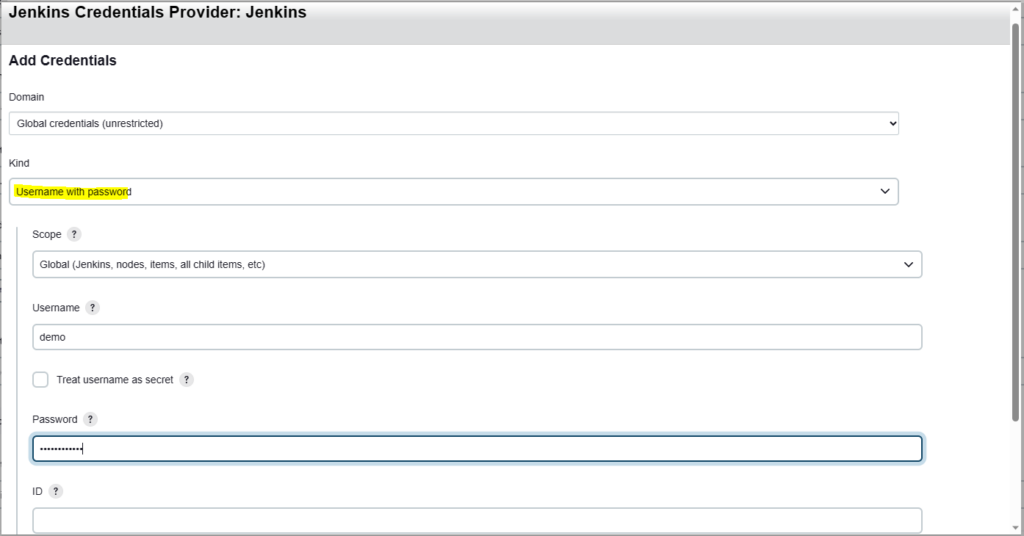
As you can see on the screen, after entering the IP address of the server where the agent will be installed, you need to provide a username for SSH connection. Jenkins controller will use this username to connect to the server and complete the agent installation. To add this user, you should click on the “Add” button in the Credentials section.
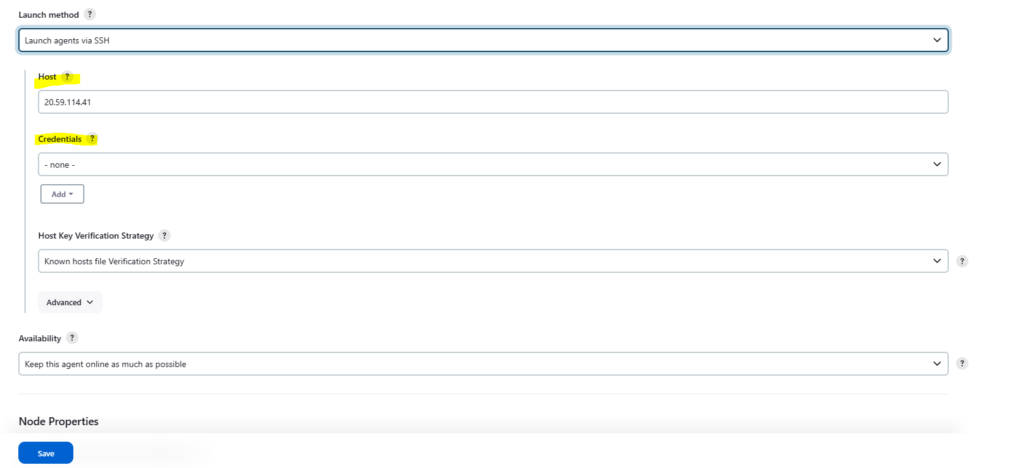
There are multiple options available to connect to the server, such as SSH key, username, password, and more. In this example, we will proceed with a user defined on the server.
After the configuration work is completed, we can start the installation by clicking the save button.
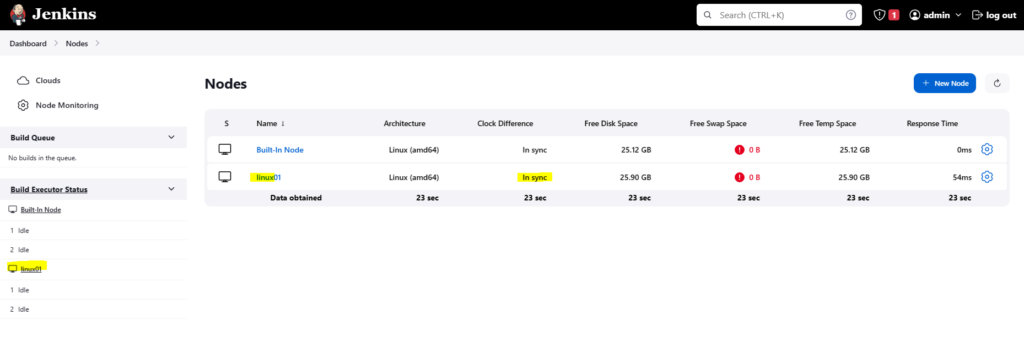
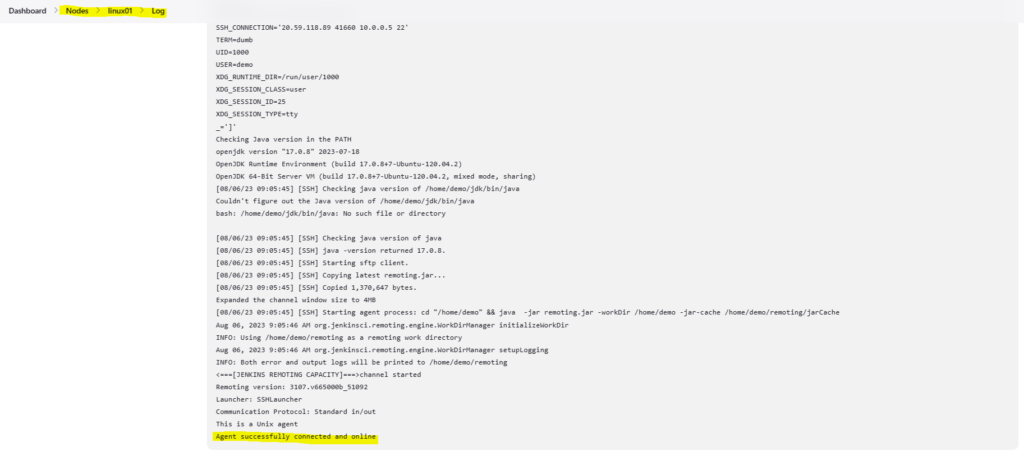
After clicking the “Save” button, you will be redirected to the Nodes page. On this page, once the newly installed agent has successfully joined the cluster, it will appear online and ready for use.
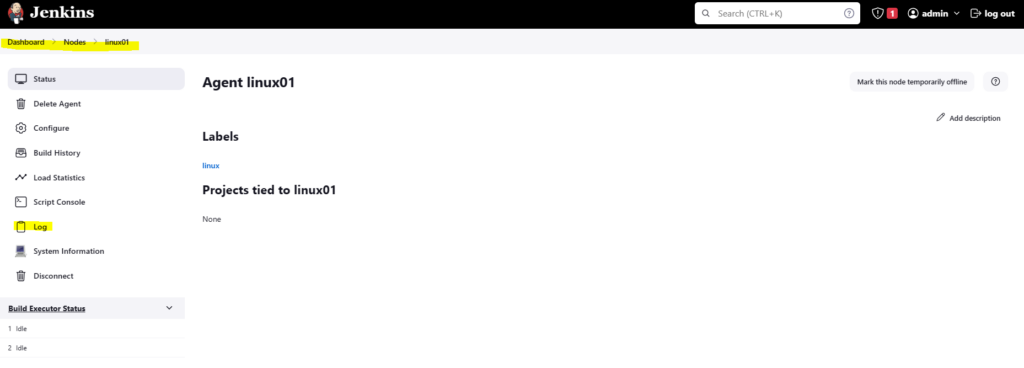
If the agent encounters any issues while joining the cluster, you can view the details in the agent node’s log page. This log provides specific information about what went wrong during the connection or setup process.
Once the agent installation is complete, you can define your build jobs in Jenkins using pipeline definitions.
