Creating and managing repositories is one of the fundamental features of Nexus Repository Manager. Understanding repository management well can facilitate the software lifecycle and assist in establishing an effective software development environment. Nexus Repository Manager offers different types of repositories, such as proxy, hosted, and group repositories, to address to various needs.
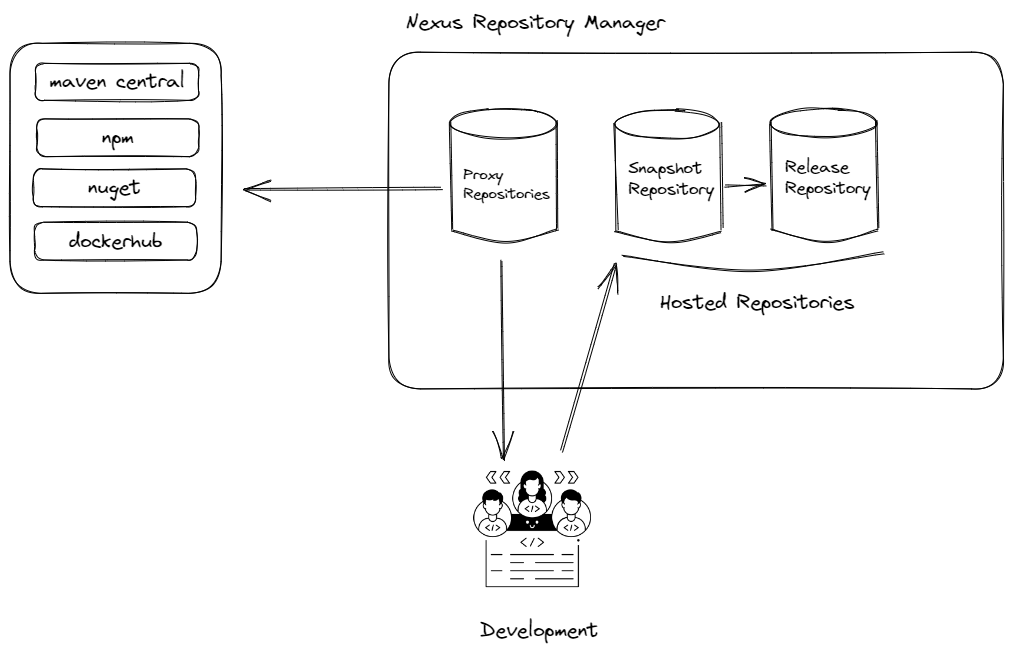
Proxy repository
The proxy repository type enables access to enhanced packages, libraries, and binary files developed by third parties in a remote repository. When developing software, we often use open-source libraries, Docker images, and binary packages. To fulfill these requirements, we download them to our local computer using package managers such as Docker client, Maven, npm, or PyPI. These package managers cache the dependencies on your local machine when you download them for the first time. However, if you download a different dependency, it will fetch the component again from the remote repository. Especially when working in a large organization, each developer will need to access the internet and download libraries from the remote repository to satisfy their requirements.
One of the essential features of Nexus Repository Manager is its ability to address such issues by creating a proxy repository type. When you create a proxy repository, the developers’ requests to download a new library first go to the proxy repository. If the library is not found in the repository, it is then fetched from the remote repository and cached. This way, when another person tries to download the same library, it will be retrieved from the cache, speeding up the build process. This caching mechanism is particularly crucial for large components like Docker images.
In the following example, we will configure a proxy repository for Docker Hub in Nexus Repository Manager.
Firstly, you need to click on the “Create Repository” button on the “Repositories” page.

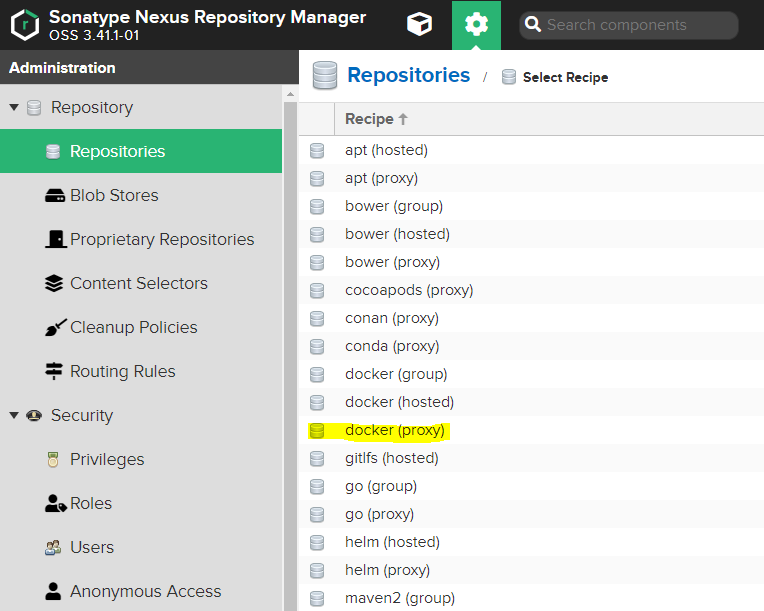
On the page that appears, you will see multiple options for remote repositories listed. In this example, we will choose “Docker (proxy)” to define a proxy repository for Docker. However, depending on your specific needs, you can also select different remote repository options such as PyPI, NuGet, Maven, and so on.
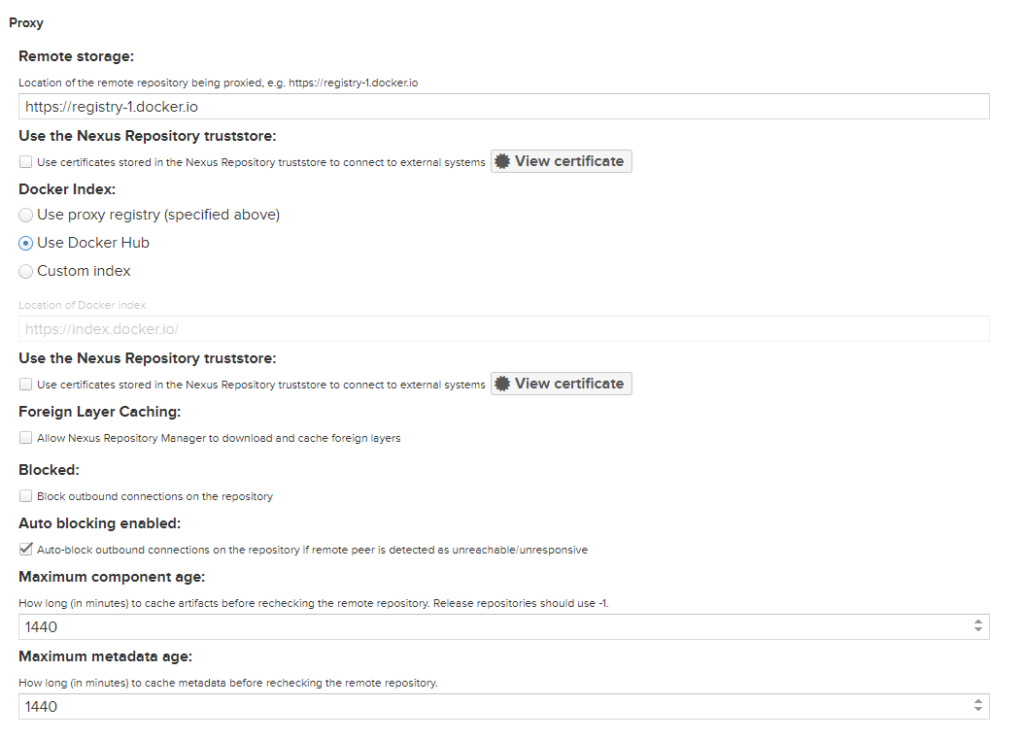
To define the repository settings, you need to fill in the fields according to the areas shown in the image below. When creating a proxy repository, it is mandatory to enter information such as Name and Remote remote storage.
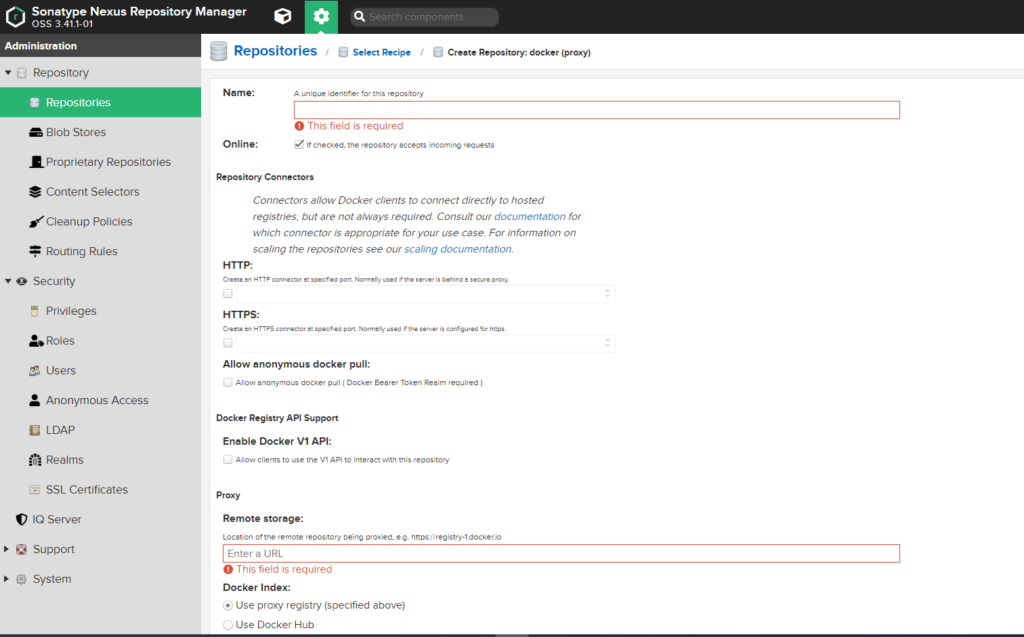
Name: Specify a repository name. We will use this repository for dockerhub so, lets set the name as dockerhub

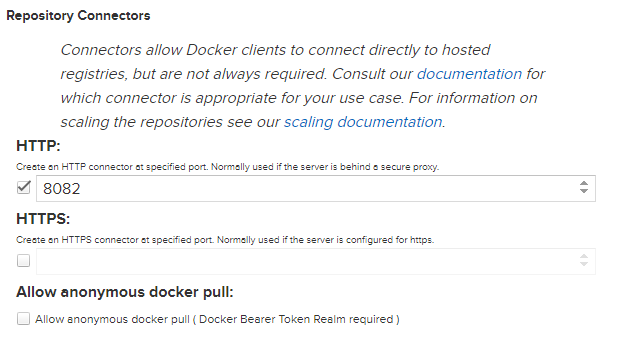
Repository Connetors: If you want users or build servers to directly access the proxy server, you can achieve this by defining HTTP or HTTPS connectors under “Repository Connectors.” You can set an unused port on the Nexus server in the HTTP field, allowing users to specify the port address to use the proxy repository. Depending on your scenario, you can also configure the HTTPS port or choose not to use a repository connector. If you create the proxy repository under a group, you won’t need to define a repository connector.
Docker Registry Api support: When the Docker client connects to a repository, it uses the Nexus Registry API. Docker Hub and most registries use the V2 version of the API. However, depending on your requirements, you can activate the V1 API if needed.

Proxy Remote Storage: To configure the remote repository address to be proxied, you need to enter the appropriate URL. In this case, since we are using Docker Hub as the remote proxy, you would enter “https://registry-1.docker.io” in the field. However, depending on your specific use case, you can enter different remote repository options such as Red Hat, Microsoft Container Registry (MCR), or others accordingly.
Docker index: To configure a remote proxy for Docker Hub, you need to select this field specifically. It should not be selected for a different remote repository.
Blocked: In some cases, you may have the need to enable or disable proxy repository remote storage requests. When you select “Blocked,” no requests will be made to the remote repository, and components will be served from the cache instead. This can be useful in situations where you want to temporarily prevent any remote requests and rely solely on the cached components.
Auto blocking enabled: When access to the remote proxy is unavailable, Nexus Repository Manager automatically blocks the proxy, and incoming requests are served from the cache. The Nexus repository manager periodically checks the remote proxy, and when access is restored, it automatically opens the proxy again. This allows for seamless operation and ensures that requests are fulfilled from the cache during temporary disruptions in remote access.
Maximum component age: This field specifies how long the downloaded components will remain in the proxy repository without being refreshed. For example, when a user requests a component from a proxy repository, Nexus will serve the component from the cache for subsequent requests for the same component. The duration specified in this field indicates how long the component will be served from the cache. Once this duration has passed, incoming requests will be fetched from the remote repository again and cached anew.
Maximum metadata age: The duration specified for component metadata determines how long the metadata will be retained after a component is downloaded. Metadata contains information about the component, such as its version, dependencies, and other relevant details. By specifying a duration for metadata retention, Nexus Repository Manager determines how long it will keep the metadata in its cache. After the specified duration elapses, the metadata will be considered stale, and subsequent requests for the same component may trigger a refresh to obtain the latest metadata from the remote repository.
Blob Store: The file blob store is indeed the default option for most installations of Nexus Repository Manager. However, it is crucial to plan your storage strategy based on factors such as repository size and the types of blob stores you require. You also have the option to create a new blob storage and select it from the dropdown list. In the example you provided, you will be using the default file blob storage for your configuration.

After you made the changes, click the create repository button. In the repositories page, you can see the new repository.

Hosted repository
The hosted repository type is used for storing, versioning, and distributing internally developed components within an organization. When multiple teams are working on the same product within an organization, it can be beneficial to break down the product into smaller parts that are developed by different teams and form a larger whole. Storing the products developed by software teams in a hosted repository, along with versioning and distributing them to different teams as needed, facilitates an efficient software development environment within the organization. Hosted repositories are typically created in two different structures: snapshot and release repositories. In an ideal software development environment, components developed for testing purposes are stored in the snapshot repository, while components developed for production are stored in the release repository for versioning.
In the following example, we will configure a Docker hosted repository in Nexus Repository Manager to store snapshot components.
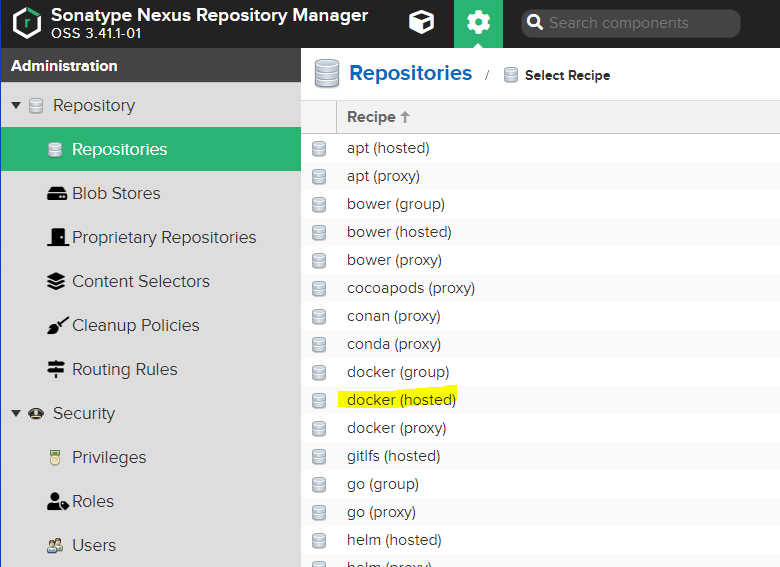
Similar to creating a proxy repository on the Repositories page, when you click on the “Create Repository” button, you need to select the “Docker (hosted)” repository type on the page that appears.
When creating a hosted repository, it is mandatory to enter the Name field, while the other fields are optional.
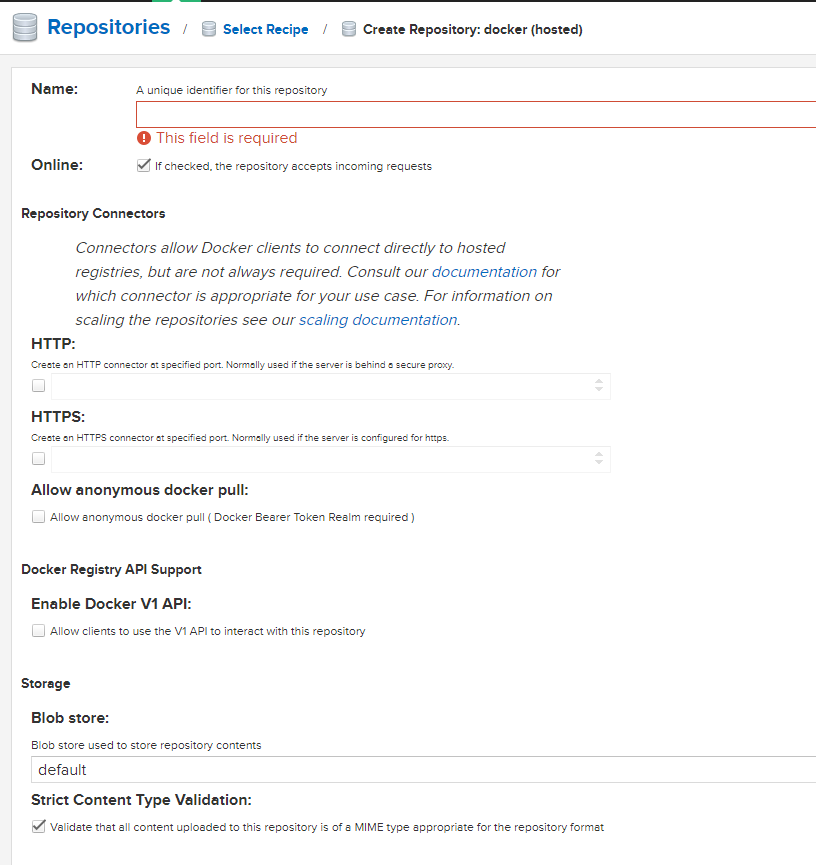
Repository Connectors: Similar to the proxy repository definition, to allow users or build servers to directly access the hosted repository, you will need to define an HTTP connector. When specifying the port information, it is important to choose an available port on the Nexus server that is not already in use. This ensures that the connector can establish the desired HTTP connection for accessing the hosted repository.

Blob Store: Nexus Repository Manager offers the option of using the file blob store for storage. However, if you have created a different blob store based on your specific needs, you can select that custom blob store from the list. This allows you to choose the appropriate blob store for your storage requirements, ensuring compatibility with your chosen storage solution.

Deployment policy: When deploying artifacts to a hosted repository, you can choose different deployment policies based on your needs. For example, with the “Allow Redeploy” option, you can deploy an artifact multiple times with the same version. On the other hand, the “Disable Redeploy” option prevents deploying an artifact with the same version more than once. In the software development lifecycle, artifacts are typically versioned when transitioning from the testing environment to the release environment. Deployments to the snapshot repository are intended for the testing environment, while deployments to the release repository are intended for the release environment. By definition, snapshots are mutable (allowing redeployment), while releases are immutable. In this example, since you’re creating a snapshot repository, you can choose the “Allow Redeploy” option. If you were creating a release repository, you could choose the “Disable Redeploy” option to ensure that the versions of the deployed artifacts are not overwritten.

Once you click the “Create Repository” button, you will have successfully created the hosted repository, and you will be able to see the newly created repository on the Repositories page. This page will display the details and configuration of the repository you just created, allowing you to manage and work with it as needed.

In this comprehensive guide, we delve into the intricacies of configuring Nexus Repository, a powerful tool for managing and hosting software artifacts. Nexus Repository plays a crucial role in modern software development workflows, providing a centralized location for storing, sharing, and distributing dependencies and artifacts.
